Written by: Camilla
Are you ready to become a NINJA at applying nail polish?
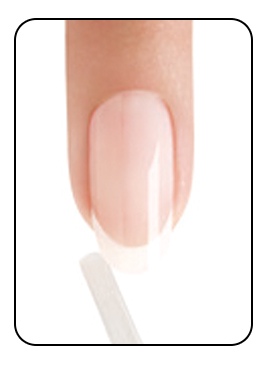
1. Grab your nail file and get started.
Start by filing your nails—even if they don’t really need it. This is crucial for the durability of the nail polish you’re about to apply. The nail consists of many layers of keratin, and these can split at the tip and "stick out." These need to be removed with a light run of the file, and then you’re ready. It’s exactly the same principle as when you paint anything else, by the way. If you’re missing a good file, you need to get the Koala file—it’s SO good for natural nails.
2. Sanitizing kills those pesky bacteria and removes oil.
The perfect polish starts with degreasing the nails. For optimal adhesion of the nail polish, you should use CND Scrubfresh or Zoya 3-in-1 Remover. They remove oil, dirt, and germs. You can also use another acetone-based product, but be careful—these products are often too harsh on the nails and often do more harm than good, as they dry out the nail.
Moisten a nail wipe or cotton pad with your sanitizing liquid and gently clean the nail. You don’t need to scrub, just make sure to get around the edges of the nail.
3. Do you remember basecoat?
Now is the time to use your basecoat—if the nail polish you’re using requires a basecoat. If the manufacturer has made a basecoat, you’re supposed to use it. Both to prevent staining your nails and to increase durability.
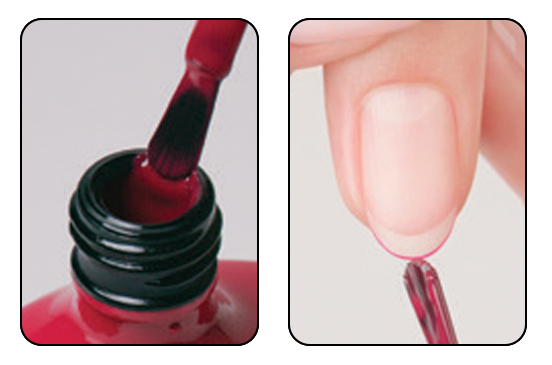
Start by sealing the edge of the nail. This is done by applying nail polish to the tip of the nail. Then apply a thin layer of basecoat, just as if you were applying nail polish.
Apply basecoat to all 10 nails before moving on. Only one layer of basecoat is needed.
4. Now it happens—the color goes on
Now it’s time to add color to your nails! This is the best part of a manicure. Now something’s happening.
-
Start by shaking your nail polish so the color mixes—this helps extend its lifespan.
-
Pull the brush out of the bottle. Wipe the brush on the inside of the neck so it only has a little product on it. Seal the free edge—just like you did when you used basecoat.
-
Pull the brush out of the bottle and wipe one side on the neck of the bottle.
-
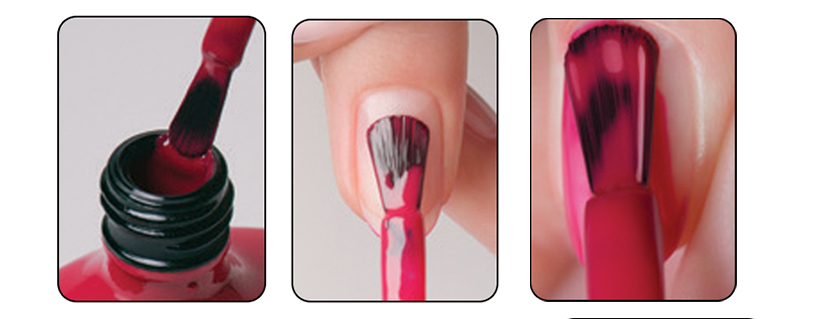
Place the brush in the middle of the nail with the side containing polish facing down.
-
Gently push the brush up toward the cuticle without touching it, and pull the brush down toward the free edge. This technique will make the bristles fan out, so the edge becomes even, precise, and close to the cuticle.
-
Place the brush again, now to the left of the nail, and pull the brush down toward the free edge.
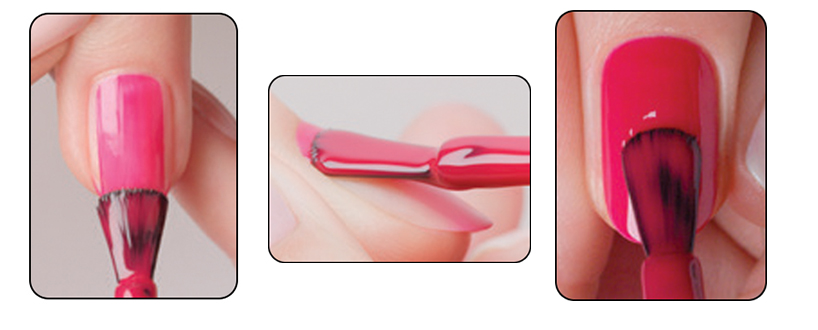
-
Repeat the same procedure, just on the right side of the nail.
-
Continue until all 10 nails have their first layer.
Now the nail is ready for the second layer of polish. The first layer doesn’t have to be fully opaque—the second layer makes the difference. Always apply 2 thin layers, even if the polish covers in the first layer.
5. Topcoat makes all the difference
Topcoat! Now it’s time for topcoat. There is no nail polish in the world that shouldn’t get a topcoat. The function of a topcoat is to seal the tiny pores in the polish and add shine. Here, you do just as you did when you applied the color.
-
Seal the edge,
-
Apply topcoat to the nail
-
Do this on all 10 nails.
I always recommend using CND Vinylux Topcoat—it’s simply the best!
6. Remember to care for your nails
When the nail polish is dry, you should give your nails plenty of care. I always recommend using nail oil, but you should also consider whether your cuticles need some extra love. Below you can find some of the best products for nail care.
.
